Sunday, May 3, 2020

Playing With Texture


To take a little break and a stretch, I decided to work differently than I usually do. So I began by creating a background I couldn't possibly do fine detailed work on! I gesso'd a 1/4" hardboard panel then added a mish-mash of various gels and mediums to create my painting surface. I used fiber paste, soft gel, and coarse paste. I would have used crackle medium also, but was dismayed to find my jar had dried up!

The next step was to draw the crow with pencil. I liked it at that stage, but needed to proceed! So I added some opaque acylic all over the background - a neutral gray, blue gray, gray green, and raw Sienna. But I quickly used baby wipes to both push the paint into the texture but also wipe much of it from the surface.

Then I turned to the crow, adding more pencil work first. Then I coated her with Anthraquinone blue. Of course it would turn out quite uneven, given the surface. But that was OK - it had to be! Then I added several washes of black over the blue.

It seemed pretty dull, so I added washes of transparent color over parts of the background - Phthalo Green, Sap Green, Quinacridone Magenta, and Manganese Blue.

Finally, I picked up my micron pen and added some lines over the crow and bunched of squigglies around her and around the edge of the moon. Well, actually, that wasn't quite the last step. I got out my acrylic paint pens and made some dots - black at the end of some squiggles, and turquoise and pink randomly.

I think this would make a nice card.

Saturday, April 25, 2020

Aunt Audrey the Badger


I wanted to do some needle-felting, so I chose to make one of the characters from my book, Tales of Love and Courage from Milkweed Manor. I was aiming for Gwen, the young badger who likes wearing girly dresses. But when I finished the felting I realized I needed to re-group.

To wear a dress, Gwen would be standing up, but when I stood her on her hind feet I didn't see how I could possibly make a dress for that body! Her body is so thick, her neck is nearly as thick as her body, and her upper arms are quite thick as well. So, what to do?


I finally decided to make her Gwen's mum, Audrey, and to give her a simple costume of a decorated shawl.


Roxanne, a raccoon and another character from the book, made the shawl for her from items she's collected from the manor house trash heap. She used fabric from a discarded blouse, and decorated the garment with a selection of her button collection and a very special ribbon rose.

Audrey is very proud to wear this wonderful creation!


Sunday, April 19, 2020

Making Blank Books


Every once in a while I get the urge to make little books, and this group is the result of my most recent urge. They're very simple because there's no drawing or painting, just simple collage. I used pieces of scrapbook paper for the backgrounds, then just added a few elements, such as scraps of paper, metal stampings, a ribbon rose, and buttons.

They were fun and simple to do and I think turned out pretty nice. The front and back covers are glued onto a piece of denim. Leaving a 1/2" gap between the covers leaves a "spine" of denim to which I sew the signatures. The signatures are groups of pages from simple copy paper.

A piece of ribbon glued onto the inside of the back cover makes a built-in bookmark, and I used buttons and twisted cords of embroidery thread for the closures.

I was so inspired that I've decided to work on a book about making books! Stay posted!

Saturday, April 4, 2020

A White Cat


I used one of my favorite techniques on this piece - collage background with painted subject.

As I scan through old magazines and catalogs looking for collage elements a color palette begins to form. In this case, I was taken by photos of some blue and white ceramics as well as a bouquet of white hydrangeas.

Once I had my collage elements selected, I applied them to an 8" x 10" board to which I had previously applied two coats of gesso. I use Liquitex matt medium as an adhesive. One of my most critical tools for collage is - surprisingly - an old magazine or catalog that I won't be using for collage elements. Here's how I use it:

To get a smooth application of the paper pieces, I apply a coat of slightly thinned medium to the board, then lay the piece I'm going to collage upside down on the catalog and apply a slightly thinned coat of medium to the back side. I brush it in really good so that the paper becomes saturated, then I can flip it over and lay it in place. I brush more matt medium over the collage element, brushing from the center outwards to force out any air bubbles trapped underneath it. (But be careful to not brush so hard that you tear the paper - tissue paper is particularly susceptible to tearing.) Brushing the back of the collage element with the medium is important because the moisture stretches the paper. That way, it won't wrinkle on you!

Sometimes I apply multiple layers of collage, letting each dry before adding the next. Sometimes I add transparent washes, or a thin coat of gesso. These paint or gesso layers somewhat obscure the images in the collage elements, and also unifies them. That done, I may want to "bring back" parts of the images as I did in this piece with the hydrangea blossoms. I accomplished this by side-loading a wide flat brush with white and redefining the edges of some of the petals.

I also enjoy embellishing the collage background with painted elements using acrylics. Examples are the leaves and linear spirals.

Finally, I'm ready for the subject. I draw the outline then paint within it with gesso. This will hide the background behind the subject. Very often, I'll need to use two coats. After it's dry, I'm ready to paint my subject. This one is painted more loosely than I usually do, and I like it!

Saturday, March 28, 2020

Offerings for Sobek - An Exercise in Perseverance


I've been watching two Great Courses by Bob Brier lately. One is the history of ancient Egypt and the other is about hieroglyphs. I'm sad and ashamed to say that I put the hieroglyph one aside for a while because I just didn't make time for the homework, but I truly hope to get back to it soon.

Anyway, I've always greatly admired ancient Egyptian art, and I especially like the crocodiles! So I decided to do a painting of a crocodile taking offerings to Sobek, the god of crocodiles, the Nile, and fertility.  Actually, the bird is not part of the offering, but he too is going to give offerings.

Now that it's complete, I like this painting. But the process was grueling. Up until the very end I had strong negative feelings about what I was creating - except for the idea. By the way, this is acrylic on gesso board, 12" x 16". I started directly on the board with only the idea of what I wanted to do.

I worked on it for six sessions, 2 to 3 hours each, and at the end of each session - except the last - I was tempted to just give up. But, telling myself there's always something to learn, I just kept going. Every morning when I got up I'd look at the painting, hoping it wasn't as bad as I thought. But it always - once again, except at the end - was every bit as bad as I thought and maybe even worse.

But in the end, I pulled it off! The trick was to keep going, keep adding detail, keep adding contrast, keep darkening the sky. And in the end, I think it worked.

Saturday, March 21, 2020

Repurposing Never Gets Old


I made this little polymer clay bear totem probably seven or eight years ago. For a while it sat around waiting for me to post it in my Etsy shop, then I decided I wanted to keep her. She has a little tassel of carnelian, citrine, and a tiny dragonfly charm. You can barely see it hanging down the far side of the stone at the bear's feet. She's raising her hand in blessing.

The jar is from a Yankee Candle. I just can't bring myself to throw these wonderful containers away, and now I've repurposed it.

I finished the lid with TENseconds Studio's VERday kit paints and patina. I chose the bronze. The paints are emulsions of finely ground metals. You apply a coat and let it dry. Then you apply a second coat and while it's still wet spray it with the patina. The patina reacts with the metal in the paint and gives a really nice look of aged metal.

After finishing the lid, I glued my totem on with E6000 glue and I now have a container for personal sized soaps. So fun! And it was nice to finally find a use for my little bear.


Sunday, March 15, 2020

Rough Stuff

These weekly "just for fun" paintings seem to go better if I think of what I'm going to do sometime during the week. But with this one, I just decided as I walked into the studio. Then, rather that use the board I had prepared, I remembered this one that had already undergone two rehashes, resulting in an extremely rough texture. It's heavy gesso over crumpled rice paper - totally unknown to me!


I quickly sketched the raccoon then, on an impulse, decided to work the background with Gelatos. These are creamy water soluble sticks by Faber-Castell and they're fun to work with, but be prepared to work loose! I applied them to the upper part, then sprayed it with water. The lower ones are on the dry surface so haven't blended. Once they're wet, you can move them around with a brush or sponge.


Here I am further along with the background and - BOLDLY - I decided to work on the raccoon a bit. Looks like a zombie, doesn't she? That's what no eyes will do for you!


But I persevered. After I finished with the Gelators, I shifted to ink pen and acrylic. Just kept working it until I was happy. I drew the outlines of the leaves with ink pen then filled them with diluted acrylic.

Amazingly, the only frustration I had with this was the whiskers. I am still searching for a fine truly opaque white pen for whiskers!

I think I'll prepare more wildly textured boards and do some more pieces like this. It was fun!

Saturday, March 7, 2020

Working on My Technique


I've done about 50 of these tinted pencil illustrations at this point, but I'm still working on my technique. As far as the pencil goes, I'm pretty happy and have only made one change along the way which is to used harder pencils. I started using HB, then 2B, but now I've dropped back to H and HB with 2B in only the very darkest parts. Seems to work better because it's not as easy to smudge.

An on-going problem for me is adding color in large areas. I find it impossible to get a smooth covering with transparent acrylic washes alone, especially since it have to paint around the objects in the foreground. From the beginning, I've tried using colored pencil for these areas but I wasn't happy with the grainy look. Then I tried smudging the colored pencil with q-tips, which is helping. The first time I tried, I added and smudged the colored pencil without fixing the graphite and got smudging on some of the graphite as q-tips are not detail 'tools." So now I do the pencil, fix it, do the colored pencil and smudge it, fix it again, add two layers of acrylic matte medium over the whole thing, then finish with the acrylic washes.

This is working better, but I'm always trying to think of something better. By the way, I've tried extender medium and glazing medium to try to make my acrylic washes smoother, but it still didn't do the trick.


This is the finished piece.

Sunday, March 1, 2020

A Testimonial to Pets


The other day I received an e-mail from Best Friends (if you don't know them, it's a large and wonderful animal rescue group based in Utah www.bestfriends.org). The e-mail invited subscribers to share their thoughts on how pets have changed their lives. That sounded inspiring, so I followed the link, ready to enter my enthusiastic response. 

When I got there and started typing in the box I soon ran out of room. What? I thought we had 255 words! No! 255 characters. So, I cut and pruned and determined to write more here in the blog.

Here are my 255 characters:

Pets make me a better person by leading by example. Not the throwing up on the bed or the rooting in the garbage example, but by their abiding love and unerring devotion, by gazing into my eyes revealing kindred spirits neither of whom need ever be alone.

And now it seems to me it's enough. Maybe 255 characters was a good idea after all.

Meanwhile, in my opinion, no blog entry should be without an image. Therefore...

This is my colored pencil and watercolor portrait of my beloved companion Mick. He looks sad - and this is an accurate representation of his expression - but he wasn't sad. He was earnest. Love you, Mick! Always!

Saturday, February 22, 2020

Painting Light - or Trying

I greatly admire those artists who skillfully paint the effects of light. I am not one of those artists and I must admit that I seldom try. But recently I did try twice - to not very good results. But I suppose trying is the first step towards succeeding. 


This is one of my illustrations for a book I'm working on, A Milkweed Christmas 2020, and here are Audrey the badger and Gwen her daughter, making Audrey's renowned herbed potato rolls for the community's Christmas pot luck. It will accompany the recipe for the rolls.

When I thought I was finished I took another look and realized there was no indication that the inside of the sett (badger burrow) would be in shadow. So I added the blue-gray transparent wash on the right side. It could have been better done. I think it should be less blue. Also, the near side of the trees should be darker. Well, at least I tried!

When I'm done with all the illustrations I'll probably go back and work more on those I'm not very happy with, and this one will be on the list.  It's a shame really because I liked the drawing a lot.


And here's the other example - last weekend's just-for-fun 8"x10" painting (acrylic on board). This little jumping goat made me think of the cow that jumped over the moon. The near side of the goat and the tail should be a lot darker. I don't think I'll change this one, though. The point of these paintings is to work quickly, not obsess, and have fun!

Saturday, February 15, 2020

Renewal in the Garden

It's been a productive week for working on my books - both writing and illustrating - and today I finished my little painting for the weekend. But this time, instead of writing about any of that, I'm writing about the wonderful feeling of renewal that working in my garden gives me.

After working a few hours a day for the past three weeks, the garden is successfully 'tucked in.' 


The roses are pruned, the clippings are in the compost pile, the dead leaves are raked up and removed, and, best of all, they all have a new layer of about 3" of compost. Actually, it would be more accurate to say 'well-rotted horse manure' - the work of my sister's horse Merlin, the heat, cold, and rain, and all the worms and little microbes who've been so busy over the past year.

It's funny, but I get really enthusiastic shoveling that horse manure from the pile into the wheelbarrow, then out of the wheelbarrow and around the roses. The texture is perfect! And it feels like I'm putting a warm blanket around the bushes. 'Good night, little roses! Sleep tight and renew your strength for a spring, summer, and fall of beautiful blooms.

My next task with them will be to add epsom salts to the base of each bush when the new growth is about 2" long.


The chrysanthemums and dahlias are tucked into a deep layer of oak leaves. The dahlias are sleeping peacefully, but the mums just won't quit! When I cut them back in November and December, the new growth had already started. That's just the way the are! As you can see, the ducks and chicken (the black bird further back) approve.


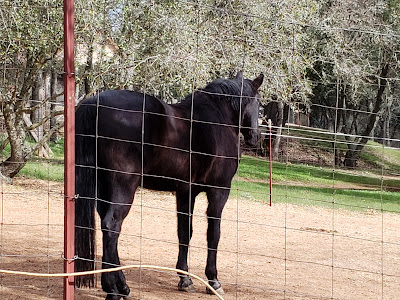
Meanwhile, Merlin, whose area abuts the garden, is ignoring me. This would be quite different if the garden were green and I were pruning. In that case, he's have his nose pressed against the fence hoping for a treat. Rose blossoms are his favorite!

But I was going to write about renewal. Well, as I've mentioned, the plants are resting and renewing. But for me, every time I work in the garden is a renewal. There's always something different, even if only minutely so. Always work to do. Always the promise of things to come. It's soothing, and also inspiring to witness the strength of life.

Saturday, February 8, 2020

Just Going For It

This is the third of my weekly just-for-fun paintings. They're acrylic, 8" x 10". My goal is to not think about it very much and not make a separate drawing first - to just go for it. And that's what I did with this one.

I looked through my old swipe file of magazine clippings collected over the years and found this little great horned owlet. The lighting really appealed to me. I decided to use black rather than white gesso, then lightly drew the owl with white charcoal pencil.


It had been a while since I last used my stencils so I got the file out, looked through it, and chose two. By the way, I made these stencils by drawing the black and white designs then creating the stencils on my Cricut machine - a handy little treasure that connects to your computer and maps the design into a cutting pattern, and, voila - a stencil!

There was not 'logical' reason for using the stencil - just wanted to. I used acrylics in two blue shades and one lavender and varied the color by pouncing my brush into the different colors before cleaning the brush. Also, working wet-in-wet blends the colors. If I were looking for a 'reason' for the stencil background, I guess I'd say the owl is against the backdrop of the tapestry of the night sky. The light blue dots could be interpreted as stars.


Here's the first layer. I included this photo because I wanted you to see how far I got with the initial painting session. And also to share a discovery. At this point, I needed to do a bit more drawing and picked up the white charcoal pencil. I liked the effect of the charcoal pencil over the paint! So I got out my pastel pencils and added quite a bit of detail. My plan was to spray the pastel pencil layer with workable fixatif. But when I did so, much of the pastel pencil detail was lost - perhaps dissolved. But it still showed some and I felt it was worthwhile.

From here, I added painted details, then dark blue washes around the edges of the background.

The finishing touch was a narrow 'frame' of glass bead gel over the entire edge, except not over where the owl touches the edge. I put the gel on with my fingertip. When the gel dried, it left the little glass bumps of the beads which I ran my finger - dipped in silver paint - over the tops of for a little sparkle.

This was definitely a for fun painting!

Saturday, February 1, 2020

A Frog's Take on Mindfulness


I'm working on the first draft of my sequel to Tales of Love and Courage from Milkweed Manor. It's called Dark Days at Milkweed Manor.

The frogs at Three Frogs Hollow are giving a pond party, and this excerpt is from conversation between the frogs and a party guest. I'm not sure what inspired this, but perhaps all the current references to 'mindfulness' had something to do with it. Enjoy!


The party was in full swing. The guests clumped in small groups enjoying the delicacies piled on their buffet plates as well as lively conversation. As Lucy, the younger muskrat, approached Burt and Buzz, two of the frog hosts, she realized they were earnestly discussing the benefits of mindlessness.

“Mindlessness? Don’t you mean ‘mindfulness?’” she queried.

“Oh, no, dear! It’s mindlessness that we find so beneficial,” Buzz asserted.

Lucy looked puzzled. “Well, what do you think mindlessness means? Perhaps I’m misinformed!” Lucy doubted she was confused, but it seemed a polite response.

“A state of mindlessness means that one minds less about things. That, of course, makes life more enjoyable!” answered Buzz, barely suppressing a roll of his bulging eyes.

“And what about ‘mindfulness?’”

Burt broke in. “Not good. When one’s mind is full there isn’t room left to think things through properly.”

“Good to know!.” Lucy graciously bowed her head slightly. “Oh, I see my friend has just arrived. Excuse me!”

Saturday, January 25, 2020

A Logo - Maybe


I watched a video workshop by Kay Fabella on branding. I've never been clear on the concept, and now I'm less unclear!

Kay strongly advised creating a tag line, a logo, and selecting fonts and a color palette to use consistently.

To come up with the tag line I thought about the book I spent the better part of last year writing and illustrating, Tales of Love and Courage from Milkweed Manor. It's a collection of stories about a group of animals living in the forest behind an old English manor house. The characters aren't doing, saying, or thinking anything that people wouldn't do, say, or think, yet for me, they absolutely have to be animals. I wouldn't have been interested in writing the same book with people as the characters. Once I realized that, I needed to understand why.

Well, my main message is that animals are not different from (and certainly not less than) people in that we're all sentient beings with emotions, thoughts, aspirations, and connections with others. Hence the tag line, "A Wider Love - we're not alone."

Then I turned my attention to the logo. This image came to me pretty quickly - the heart, the woodland creatures, and the natural color palette. And, of course, the tag line. It was really fun to do and I'm especially happy with the job I did on the animals. But it seems pretty complex. And pretty large.

So now the question remains: What do I do with it?

One other thing I should pass on from Kay's video is her emphasis on consistency. The value of it is people know what to expect from me, and can recognize my work.

All in all, the video was valuable, and I'm sure I'll find something to do with my logo!

Saturday, January 18, 2020

A Fantasy Writer's Conundrum


As a visual artist as well as an author, I have a very difficult time writing a blog post without including at least one image. So here's one of the 34 illustrations I did for my book Tales of Love and Courage from Milkweed Manor. And it actually ties in to what I'm going to write about today, which is a conundrum in writing fantasy.

You can clearly tell I write fantasy by the apron on the hare as well as the cat and rat having a calm conversation.

Last year my sister bought me a wonderful book, Writing for Animals, an anthology of essays about writing in the voice or, and to advance the cause of animals. One of the essays (so sorry I can't remember which one it was and therefore the author) advised for writers of fantasy to add as many realistic details as possible so as to avoid stretching the reader's credulity too far.

I've been writing the sequel to my Milkweed book, Dark Days at Milkweed Manor, and last night I was working on the opening scenes of one of the stories. A hare and two rats are sitting on the fringe of a work site where large machines are scraping, digging, and gouging the earth. Tragically, the ground they're destroying was the home of these three animals as well as many others who have been killed or displaced.

When I woke up this morning, one of the first thoughts that came to mind was realizing hares don't live in burrows - they live in grass nests! So, surely, living in grass nests, the hares would have had plenty of time to escape. Oh, no! What to do?

If I left my writing as is, then I'd be in error about the way hares live. Even if most readers wouldn't catch the error, some would and I would always know it was there. On the other hand, if I write about the hares living in above-ground grass nests, the story as I've written it won't make sense. 

After some cogitation I decided to be as unspecific as I can while still leaving an impressions that the hares were in a position to be caught unawares. This may seem to be a small problem, but I'm glad I caught it!

Saturday, January 11, 2020

What Makes it All Worthwhile

Back in 2008 I put blood, sweat, and tears (figuratively, of course) into my third art instruction book, Drawing Birds with Colored Pencils. But it was really worth it. Not just because it did quite well on Amazon and, 12 years later, still is! But mostly because writing, illustrating, and finishing it was such a feeling of accomplishment.

And on the way, I learned quite a bit about birds. One of the things that amazes me most about them is how much they can express with body language even though:
they have rigid beaks so can't smile
they can't control individual wing or tail feathers so they can't use their 'arms' expressively
and their spines are fused from shoulder to hip, so no striking asymmetric poses!

But what I really want to tell you is an amazing thing that happened today. Let me preface by saying that although I have an Instagram account I haven't used it in close to a year. Today I was waiting in the truck for my sister to emerge from the grocery store and for lack of anything better to do, checked out Instagram. And there was an amazing post from a junior high school art teacher. She posted photos of the work of four of her students and explained they had been drawing birds from my book! Made me so happy!

I wish I could include the photos here, but I can't copy them off Facebook or Instagram. However, here is a photo I found on Google of someone's work with my book underneath. Sorry but I don't know the name of this artist.


And here are two of my drawing from the book. If you're interested, you can find the book on Amazon by clicking on the link to the right - the book cover illustration with the rat, hare, and crow.


Saturday, January 4, 2020

Needle Felted Guinea Pig - Part 2


The last time I worked on this little guinea pig I had spent quite a bit of time building the form with core wool. So when I picked her up again I didn't have a whole lot more to do before I could start with the final colors.


Here's the finished product. Adding the colored wool increased the body size somewhat. I spent most of my time, though, on the head and face. The ears are wool felt. I cut the shapes then tacked them to the head with a large needle and thick (like carpet thread) thread. The final coat of wool also helps hold them in place.


The eyes are 6mm black glass beads. I really like using beads because the run the thread through one bead, through the head, through the other bead, back through the head, then tie the thread tight. This pull the eyes towards each other for a more realistic look. I thread each of the thread ends back onto the needle, run the needle through the head again, and clip the thread close to hide the thread ends.

I used chalk cakes and a small brush to add a bit of blush to her cheeks and a dark brown edge to her ears.

It's hard for me to resist adding something more, so I found two lengths of pretty organza ribbon and gave her a nice bow. For the final tough, I dabbed dots of glitter glue here and there on the ribbon.

This little one doesn't have a name yet. That will be up to my sister when I give this to her for her birthday!