Wednesday, October 29, 2014

My Third Jane Austen Cat is Finished

 
Here's Fanny Price, Jane Austen's heroine from Mansfield Park, with her knitted cape, cap to shade her fair complexion from the sun, and demure expression.  I think she looks pretty cute.
 
So now I have a trio of these cats - Elizabeth Bennett, Mary Crawford, and Fanny Price.  I'm not sure what to do with them though.  I guess I could put off that question by reading more Jane Austen novels.  Maybe Northanger Abbey should be next....

Tuesday, October 28, 2014

Color for Fanny

Now I've applied the first layer of color to the painting of Fanny Price the cat.  I'm using Polychromos Watercolor pencils.  I find it very difficult - impossible, actually - to get a smooth layer of color over a larger area, but that's OK with me for this because I kind of like the mottled look.  I'm working on Strathmore Mixed Media paper, and I've applied workable fixative over the graphite pencil, so it's very possibly a problem with the surface I'm using rather than with the watercolor pencils themselves, as it seems that the damp brush pushes the paint around on the somewhat slick surface.

I was trying for a less yellow background color.  The pencil I began with was even yellower than this, but I layered a medium brown over it, and then even the purple towards the bottom to try to dull it a bit more.

By the way, I should say that something I really like about Polychromos watercolor pencil is that the colors, once dampened and dried, don't more around under the next wet layer.  The exception I've found to this is black.  Black, even when dry, readily re-wets and moves around.  Little things that one gets to know...

Sunday, October 26, 2014

Fanny Price, cont.

Here's the second layer of pencil on Fanny Price.  For this layer, I switched to my 2B pencil for darker value contrast than in the first layer.  I didn't go over every single line in the knitted cape, but only here and there.  Mostly I worked on her eyes and face.

As always with pencil, I find it so useful to impress lines into the paper with a stylus - the lines, that is, that I want to remain white, like the whiskers. Inevitably, they get  darker as I work, most often from any water media that I add.  But still, it's a good way to begin with them.

I've had a bit of trouble with her expression.  Fanny is a very serious character, but she may look a bit too glum here!

Thursday, October 23, 2014

Fanny Price


Here's the beginning of my portrait of Jane Austen's character from Mansfield Park, Fanny Price.  She's very, very proper, and perhaps a bit prim.  She's the daughter of a cat whose poor choices in early life landed her in poverty.  But her generous uncle, who had room in both his heart and home, took her in as a small kitten.  Great things are in store for her.  But, for the moment, she's demurely clad in a bonnet and knitted capelet.

This phase of the drawing comprises all my work with HB lead.  I'm establishing the basic drawing as well as the beginnings of the values and textures.  I'm working on Strathmore Mixed Media paper which I like very much.  Not only does it take graphite pencil well, but it's wonderful with all wet media - which come later.

Wednesday, October 22, 2014

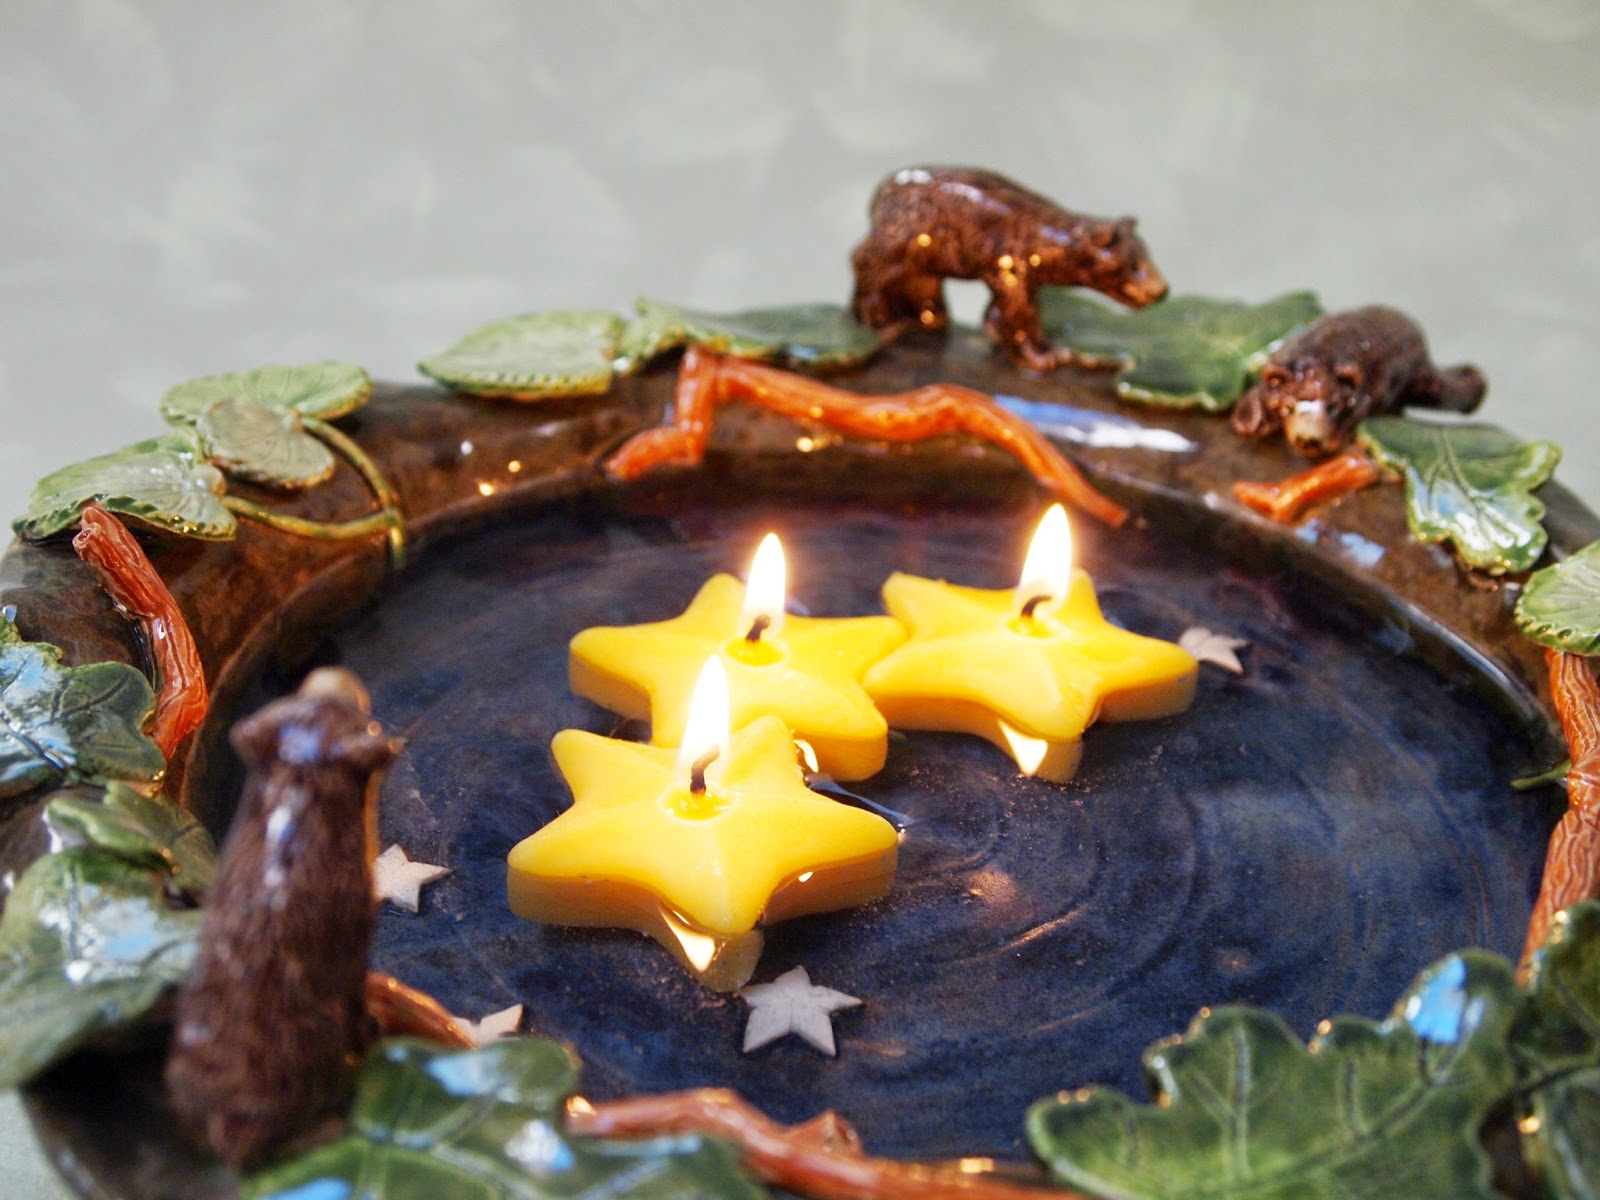
The Bears are at the Lake

 I imagine myself entertaining at my imaginary woodland cabin in the foothills.  This is the perfect centerpiece for my table - a unique, one-of-a-kind ceramic bowl for floating candles.  Look how the candlelight reflects off of the bears!

The bottom of the bowl is glazed a rich dark blue and there are raised white stars - the night sky.  And it seems that it's the summer night sky because of the full rich green leaves.

I can't tell you why I have totally ignored scale in this piece.  Clearly the leaves are way too big for the bears, or vice versa.  But I just didn't care.  For me, it's not bothersome.  The bears are clearly in the woods. This is a decorative piece and the rules of reality are banished!

Tuesday, October 21, 2014

A Mouse in a Rose

I didn't quite achieve what I wanted to with this one.  I wanted a mouse tucked among the petals of the rose, but I just couldn't do it.  For the rose to keep its form, the petals had to be somewhat dry, but then they were to dry to bend around the mouse.  So the best I could do was make the flower and then try to make the mouse look like she's perched on a petal.

Also, that tail is so fragile that I didn't want to mess with it much.  So, here it is, ready to dry and go into the kiln.  I'm hoping that the glaze will make the design a bit clearer.

Thursday, October 16, 2014

Cat Shaman Again

I did a cat shaman a few months ago but never glazed it.  I'm not that happy with it, I guess, so I decided to try the subject again.  This one is better.  I wonder why cats are so hard to draw or sculpt?  They're not that different in structure from other animals, but somehow they elude me.  Perhaps practice in the answer.

It doesn't show so well in this picture, but when I formed the basic cone for the body, I got the idea of cutting a leaf shape from the bottom corner on the left.  It turned out pretty cool, and when it's glazed I'll take a photo where that part shows better.

I'm taking more time and care on the construction of these pieces now.  I used to leave the bottom open and you could look up inside and see where the head pokes in, etc.  On this one, I added a piece to cover the bottom.  That's where I put my signature stamp, instead of up inside, and it looks better and more polished.  Of course I had to poke a hole in it so the air can escape when it's fired.

Wednesday, October 15, 2014

An Interlude with Clay


I'm back to clay for a while, and here's my first effort in this new batch.  Obviously, it's a vase.  It's about 8" tall with two polar bears at the top.  The pattern on the front is snowflakes from a variety of rubber stamps.  The bear on the right is boosting himself upwards by stepping on a snowflake that sticks out somewhat from the vase.
I pressed the stamps into the clay after I formed the vase, and this was a mistake.  Even though I had my other hand on the inside of the vase behind the stamp, I wasn't able to get a nice clear impression.  At that point, though, I really didn't want to start over as it had been quite an effort to build this vase - which I did with clay slabs.  So I just decided to go with it and lesson learned for the future!
I'm still thinking about what glazes I'll use.  I have a pretty celadon crackle which might be nice for the body of the vase.  But that decision is in the future - after drying and bisque firing.
Whenn I began this project I realized that it didn't quite make "sense."  Why would you use a vase in the winter time?  What would you put in it?  Would the contents obscure the bears?  Well, we'll just have to see.  I think bare winter branches might be one nice possibility.  Or perhaps those fake branches that have little lights on them...

Friday, October 10, 2014

Autumn Fox Painting - Finished!

I finished the autumn fox painting.  It was a matter of working more on the foreground grass and adding the crows.  Despite the fact that the reason I did this painting was for my autumn banner for my Etsy shop, I'm pleased with the painting on its own.  Etsy banners are a difficult size - 760 pixels wide by 100 pixels tall, so very long and narrow.  For me, it's better to do a whole painting then take a slice from it than to begin desigining something that weird size.

It was gratifying to get back to painting for a while.

Monday, October 6, 2014

Back to the Fox Painting

Here's the next stage of the autumn fox painting.  I worked more on the trees, defining the shadow areas, adding brighter highlights here and there, and adding more branches.

Then I worked on the field.  I was itching to get to the fox, but had to finish what would be behind him first.  The field is mostly Raw Sienna, Taupe, and Yellow Ochre with washes of Dioxazine Purple for the shadow under the fox and the darker area at the bottom of the painting.

Finally, it was on to the fox.  I usually paint animals by blocking in color and then deepening the color and building form and texture with a liner brush.  But this time I substituted a small, beat up round bristle brush for the liner brush and liked the results it gave.  In some areas I dabbed with it, and in others, I stroked.  I guess it was sort of like painting with dry brush.  Of course, for the small details in the face I did use my liner brush as well as small round and flat Golden Taklon brushes.

This would be a good time to put in a plug for my favorite brushes - they're Scharff brushes from http://www.artbrush.com.  Check them out if you have a chance!

Thursday, October 2, 2014

A Pleasant Interruption


A friend asked me to make two journals as gifts for her new (by marriage) granddaughters, and I was happy and honored to oblige.  Ironically, I had been thinking for the past few days that I would like to get back to making journals.  That, and the fact that the theme was to be cats, made the project - an interruption to my progress on my autumn fox painting - a very pleasant interruption indeed.
 
It was such a treat to paint the cats, and fun to select the buttons and thread for the binding.  Although I already had buttons that would work, I decided to go to a sewing store to find the ones that would be absolutely perfect.  Much to my surprise, there were no buttons at all in this shade of blue!  How we consumers are held hostage by the fashion palette of the season!
 
I am happy to report that my friend was pleased with the journals, and also that I'm planning to make more.  I'd like to do one with a polar bear and one with an owl - perhaps a snowy owl.