Sunday, June 29, 2014

My 2014 NIADA Application

I just sent in my Artists Application to NIADA, the National Institute of American Doll Artists.  The name is actually behind the times as the organization has many members from around the world, and the current president is from New Zealand.

I went to the convention last June.  It was their 50th anniversay and their convention was held a convenient drive from here, so I decided to go.  I applied at that time also, but was rejected.  The process was encouraging, though, with lots of helpful feedback.

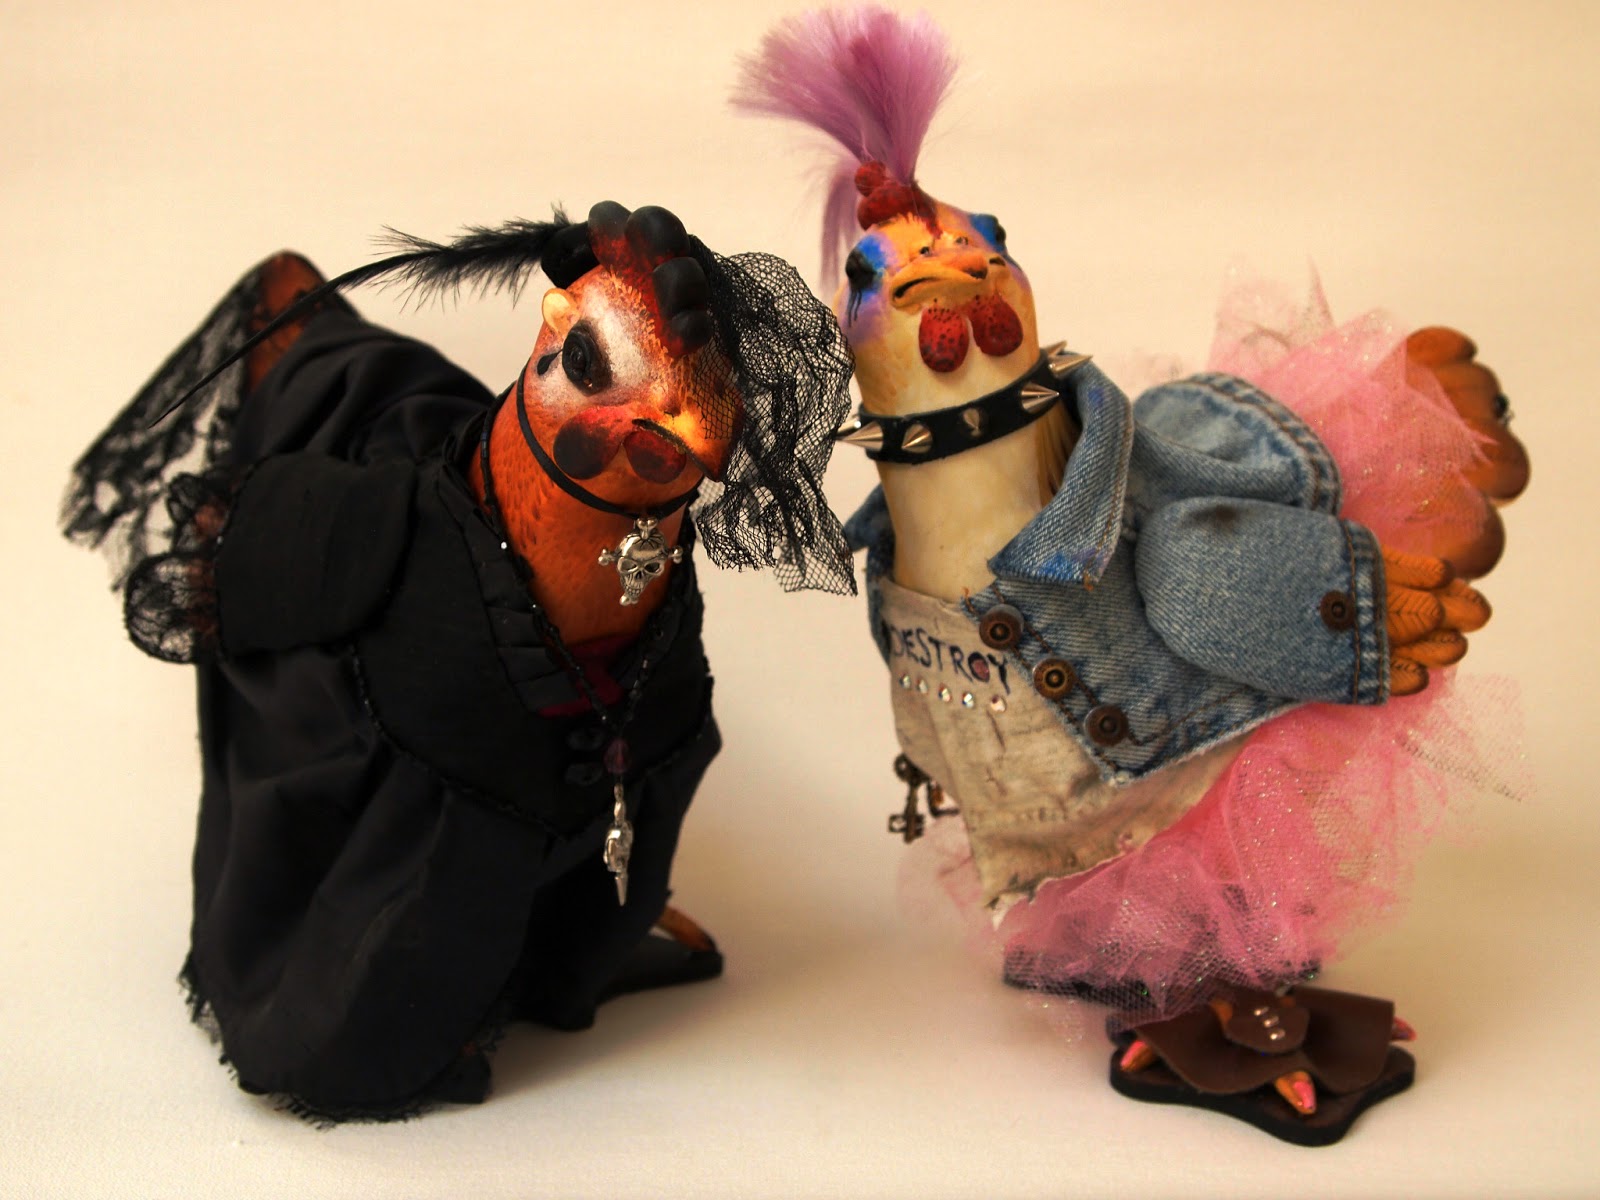
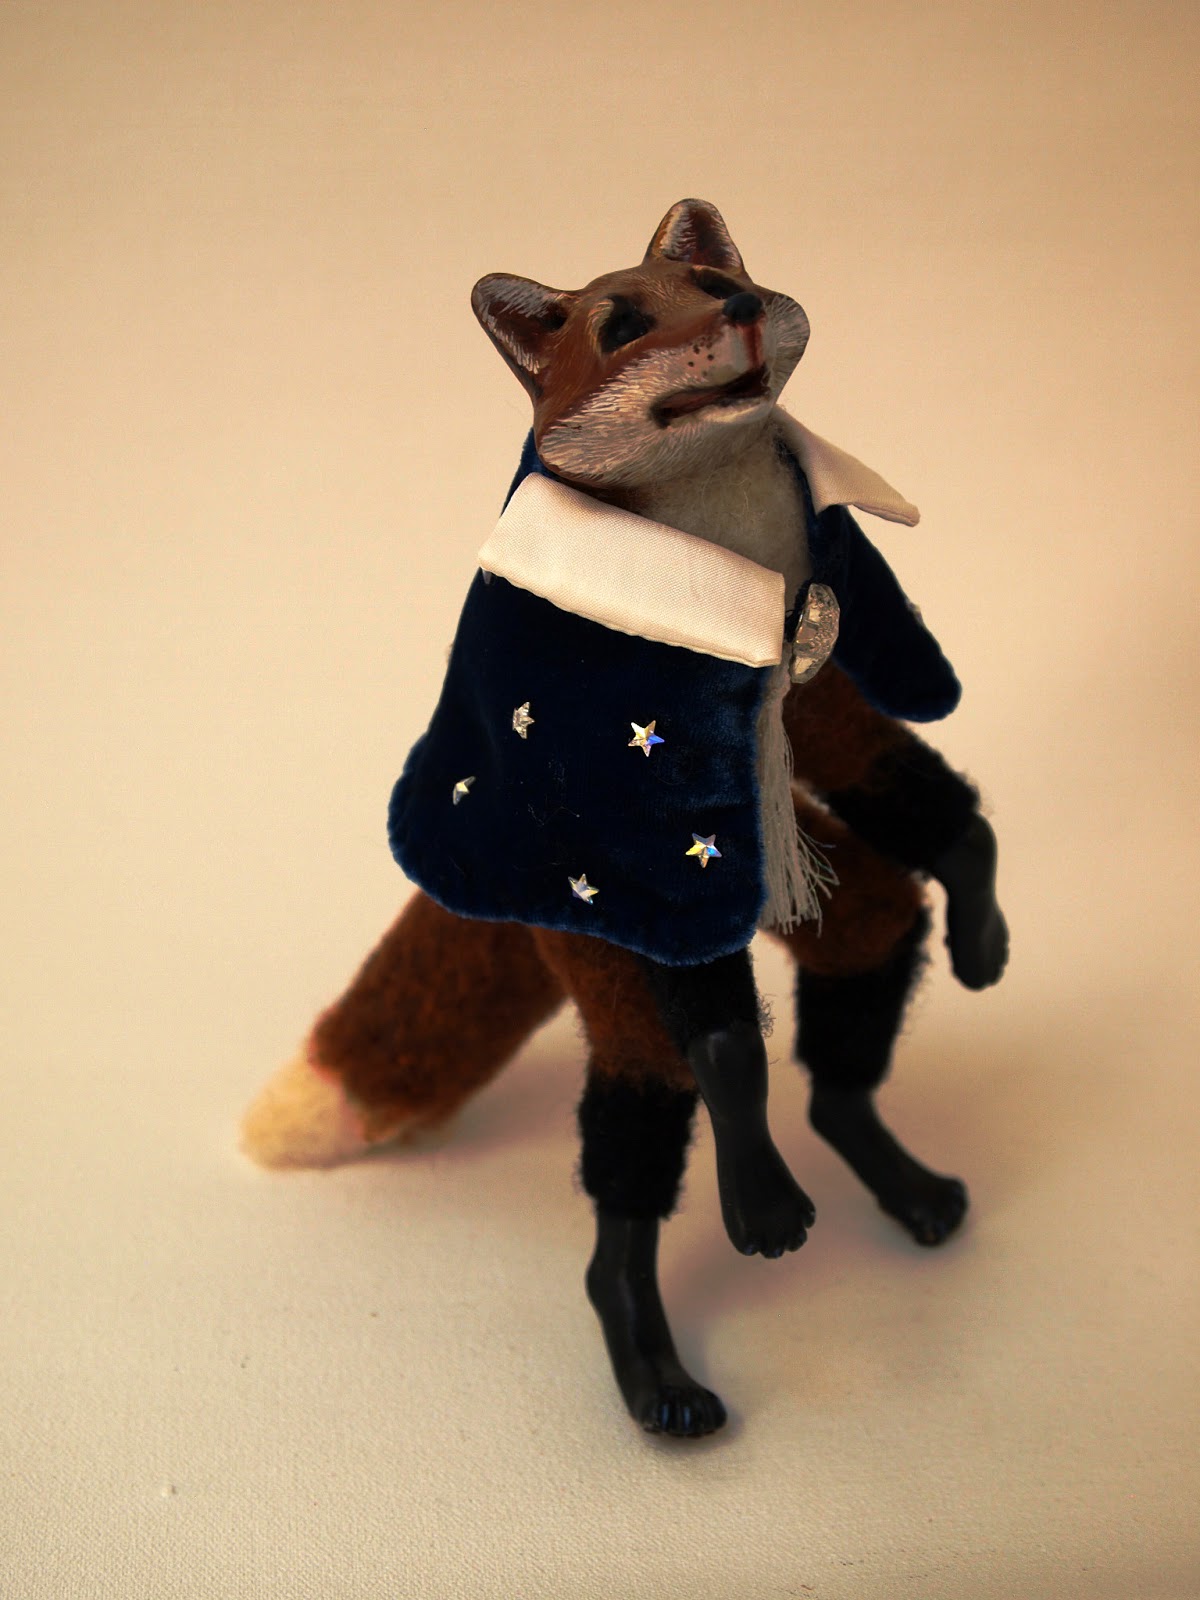
The application requires photos and descriptions of four original dolls.  Actually, two of my entries were ensembles.  The duck above is from "Lady of the Lake,"  She, of course, is the lady of the lake, but also included in the ensemble are her faithful duck attendant and a passerby, Poor Beggar Frog.  The other ensemble is a duet, "Punk Meets Goth" which are two costumed chickens.  The other entries are a cat in "The Night Journey," and a fox in "Stargazer."
"Stargazer"

"Punk Meets Goth"


"Night Journey"
"Lady of the Lake"
If you'd like to see the rest of the photos of these pieces, check out my Picasa album here: https://picasaweb.google.com/110451788987635868561/NIADA2014Application?authkey=Gv1sRgCPvkyJ6KuIeJjAE#

Saturday, June 28, 2014

Finished Needle Felted Bear

Here is Swithun, my needle felted bear, all finished and ready for adventure in the forest.

I finished him this afternoon.  Mostly it was a fun process, but there was a bit of angst, especially with the muzzle which was too big on the initial layers.

I used glass eyes.  (They are 9mm and I got them at www.glasseyesonline.com.)  They had wires, and I thought that the wires would poke into the wool, but they didn't.  Probably because I needle felted a pretty compact base for the eyes.  So I cut the wires off and glued the eyes on with Alene's Quick Grab.  Oh, and I felted tan under them so the irises would show.

After the glue dried I felted around them with the dark wool.  Before this step, the eyes were looking pretty scary with the tan rims all around.

After much fussing and wondering what to do, I think I achieved a pretty nice face. 

Thanks, Sara, for sharing your methods on your videos on www.sarafinafiberart.com.


Friday, June 27, 2014

The Bear Has Core Wool

Here's my bear with her core wool added.  This wool is roving.  When I've felted before I've always used batt.  So wrapping with the roving is something new for me as I follow Sara Rezulli's method.

I found that this went pretty quickly and was not very difficult.  I began by wrapping the toes with tiny bits of wool then continued with the legs which took four layers of wrapping.  Body, neck, and head were next.  After I wrapped those several time, I added large half-egg shapes on her sides and cheeks.  Then I found that I needed to build up her rump, belly, and the spaces between the half-egg sides and the tops of the legs.  My only concern is that I may have added a bit too much core wool on her head.  I say that because there needs to be "room" to add the finish wool all over.

So, my continued thanks to Sara for her many videos in which she generously shares her methods.  You can find her at www.warafinafiberart.com.

By the way, I'm liking the way the claws look.  I think it was important to put them on to help define her as "bear."

Thursday, June 26, 2014

Felting According to Sara Renzulli


I stumbled across an inspiring website for needle-felting animals - www.Sarafinafiberart.com.  Actually, I found her website from her Etsy shop, SarafinaFiberArt, which I came across when I was creating an Etsy treasury with a fox theme. (She sells a kit for making a needle felted fox).   I was instantly attracted to her needle-felted animals and was excited to find several instructional videos on her website.

Then I noticed a lovely wool that she had for sale in her Etsy shop.  She commented in its item description that she would like to make a bear from it.  So I decided to follow her general method from the videos and make a bear from that wool, bears being one of my favorite animals.

Her first step is to make the armature from aluminum wire.  I'm not sure what gauge she uses, but I had 16 on hand so that's what I used. I found images of black bear skeletons on the internet and used those for reference.

Next, I made toes with 26 gauge fabric-covered florist wire (which she sells in her shop).  I made the toes because I wanted to add claws and needed something to attach them to.  I sculpted the claws from polymer clay, poking a hole in the toe end of each one, being sure that the hole would be big enough to slip over the twisted wire.  After curing and varnishing the polymer clay claws,  I glued them in place with two-part epoxy.  Then, a la Sara, I wrapped the armature with pipe cleaners.

My bear has been at this stage for two days now because I'm a bit timid to begin the felting.  But that's the next step and hopefully I can get started on it tomorrow.

Wednesday, June 25, 2014

Bear Cub Totem

I made this little bear cub early on in my sculpting adventures, about a year ago.  He's a buff stoneware clay - not glazed, but dipped in melted beeswax.

Connie Smith taught us the beeswax technique in a class I took from her last June.  In fact, that class was really the beginning of my working in ceramic clay.  Connie didn't glaze her pieces, but colored them with mason stains brushed onto wet clay.  So I think she was using the beeswax both to protect the stains a bit (though I don't know if they need protection) and also to give the piece a little sheen.

The beeswax also feels so nice in the hand, which is an added plus for a little totem.

The stones I used are turquoise, variscite, and amber, with variations among both the amber dark to light yellowish gold) and (dark to light green) variscite bead colors.  I attached them with artificial sinew, which I also use for my (few and far between) pine needle baskets since I am quite adverse to using animal products that harm animals (don't know about the beeswax, now that I think about it. Even if harvesting beeswax doesn't directly harm the bees, it may frustrate them!)

When I sculpted this bear I didn't leave a good way to wrap the sinew, so I'll have to remember to do that in sculpting future totems.

Tuesday, June 24, 2014

Displaying Drawings the Easy and Inexpensive Way

 
Nearly two years ago I did three little drawings of cats.  This one is the largest and, if I remember correctly, it's 5" by 6".  They've been kicking around my studio ever since.  I was hesitant to frame them because the frame, glass, and mat are either a pain to do myself or expensive to buy.  So I came up with a new way the display drawings that I'm very pleased with.  I especially like it for small drawings, but it would work for larger ones also - you'd just have a hard time displaying them in an easel like this one.
 
My first step was to cut the board for the backing.  To size the board, I added a 2" margin all around the drawing.  So this board was 9" by 10".  I cut it from 1/4" thick hardboard (I'm lucky enough to have the woodworking equipment to do it) and applied spray primer (from the home improvement store) on both sides and the edges.  Next I painted the board.  The black is plain Burnt Umber.  The front is more complicated as I built up color and texture with several layers and a variety of techniques.  I was looking for a finish that would be visually interesting but wouldn't compete too much with the drawing.  The light streak that shows down the right side is a bit of iridescent silver that I applied all around the edges with my fingertip and then "pushed back" with a wash of Burnt Umber.
 
By the way, you may notice that the car's eyes look very slightly green.  That's because I added the lightest possible coat of green colored pencil to the eyes.  The rest of the drawing is graphite.
 
I protected the drawing with a good coat of spray workable fixative. then tore the edges for the look I wanted (helps to draw on a bigger piece of paper than you think you need!).  To adhere the drawing to the board, I dampened the drawing, applied a coat of acrylic matt gel medium to the board, and pressed the drawing in place, rolling out any air bubbles.  When all was dry, I applied a few coats of acrylic varnish.
 
Now I have a piece of art that I can either hang on the wall or display on a tabletop easel, and the "framing" was not expensive or difficult!
Thursday, June 19, 2014

Bunny Shaman

 
This little one looks so much like Beatrix Potter's Peter Rabbit, or, more properly, Mopsy since this rabbit is a girl.  I didn't try to do that - it just happened.  I guess Beatrix Potter's work is just part of my subconscious.
 
I did something a little different on this shaman.  I left the cloak open at the bottom and added the lower part of the body, the legs, and the tail inside the cone of the cloak.  It wasn't really much more work, but it looks like there's more to the figurine.
 
I have some very hefty violets growing in my garden, so I was able to use real violet leaves for the impression on the cloak.  I find that the veins are more prominent on the undersides of the leaves, so I press them into the clay upside down.  For the center of the flower, I used a little iridescent topaz glass drop bead.  I left a hole for it in the clay, then after the bunny was all glazed and done, I threaded a small piece of wire through the hole in the bead and twisted the ends together for a little "stem."  Then I glued the stem into the hole in the clay.  I think it's more secure with the wire rather than just gluing the bead directly to the clay.
 
This little girl got views and favorites within the first hour she was in my Etsy shop.  I hope she finds a new good home!

Wednesday, June 11, 2014

The Glazed Bear Shaman

The little bear shaman is out of the kiln now and you can see how different the glaze colors are from the previous posting and appreciate why it's so important to have some system to keep track of the finished colors as you're applying the glazes.

Sometimes the colors get a bit splotchy, but I've come to accept that as part of the "look."

Anyway, I'm really enjoying making these little animal figuries.  The challenge is simply to make them a bit different from every other little animal figurine and to establish my own style.  I guess one thing that helps define my style is fantasy.  I'll have to think about what the others are.

Perhaps a sense of kindness and gentle fun.  Hopefully a vision of all creatures being connected by their similarities.  Happiness, and nice colors.  And a positive, loving outlook on life.  That, anyway, would be my hope.

Monday, June 9, 2014

My Glazing Set-Up

When I first started working with ceramics, the part I liked least of all was glazing.  It was just so confusing how the un-fired colors looked so different from the fired ones.  It was difficult to keep track of what glaze should go where since the colors gave no clues.  So here's what I did, and I find that it helps quite a bit.

Every time I got a new glaze, I made a little color chip.  You can see these color chips sitting on the lids of the glaze jars.  The chips are just 1 1/2" rounds.  On each chip, I use alphabet stamps on the wet clay to impress the name of the glaze, plus an initial for the manufacturer and line of glazes (for example, "M" for Mayco and "E" for Elements).  So the chip in this example would say M E Tidal Pool.  I also impressed two coil designs with coiled copper wire.  The printing and coil impressions then show me how the glaze will "break" over surface texture.

I keep all my color chips in a little box and when I'm ready to glaze something, I get out the box of color chips and go through them to find the colors I want to use.  Then I get out the jars of the selected glazes and lay the corresponding color chip on the tops of the jars.  This gives me a good visual guide to the colors as I decorate my piece.

In the photo you see the little bear shaman with three layers of glaze.  And when I post a photo of the fired piece tomorrow I think you'll be surprised - unless you've worked with glazes before - how different the piece looks!

Sunday, June 8, 2014

Lots of Stuff in the Kiln

Yesterday I wrote that I had been in a sculpting frenzy, and here's some of the evidence.  You're looking down into my kiln before I close the lid for firing.  And you're seeing the top of two shelves that are filled with greenware ready for their bisque firing.  The bottom shelf, which isn't visible in the photo, is entirely occupied by a single piece - a large shallow bowl that is intended as a centerpiece in which one would float candles.

I was a bit hesitant to fire tonight because the most recent piece was only finished three days ago.  But I work thin, and the house has been very warm, around 80 degrees.  And all the pieces felt warm to the touch, so here's hoping for a successful outcome.  For those of you who aren't familiar with firing greenware, the problem is that if all the water isn't dried out of the clay the piece will crack (best case) or explode (worst case as it can ruin other pieces in the kiln).

Today I sculpted two little stoneware dragons then put all my clay stuff away for a while.  It's time for drawing -- or painting -- or beading.......

Saturday, June 7, 2014

A Sculpting Frenzy

Since I posted last I've been sculpting, sculpting, sculpting.  Part of it's because with my new larger kiln I don't like to fire it up unless I have a fair amount of stuff in it.  But the other part is simply that I've felt like sculpting.  And actually, I've made more pieces than these, so I'll have to post those others tomorrow.

One of my Etsy customers gave me the idea for the alligator.  And I have to say that even though I don't feel a lot of kinship with alligators, this one was a kick to make.  As I could have predicted, she came out cute.  My ultimate plan for her is that she'll have a necklace of shells and teeth and perhaps a feather head dress.

The little bear just looks goofy, but she's very content wrapped in her cloak adorned with blackberries.

And, continuing on the animal shaman theme, I made a rabbit.  I decorated her cloak by impressing it with violet leaves.  The end result is a bit unrecognizable as such, but the impressions make a nice pattern.  The clasp for the cloak is, of course, a violet.

I would say I'm making progress with ceramics because I now look forward to glazing my pieces whereas in the past glazing was a chore to be avoided.  Can't wait to see how these come out!