Saturday, July 16, 2016

The Third Totem - a Running Hare


Here's the third and final totem animal of the latest batch - a running hare.  His ears as SO big, and his legs are SO long.  He's carrying a beautiful assortment of semi-precious gemstone beads, tied onto his back with artificial sinew.  The carnelians are beautiful flat faceted square.  The turquoise are small nuggets from the Sleeping Beauty mine.  And the amber is a large perfectly clear bead of a quintessential amber color.

This is another of my favorite glazes - "Sandstorm" by Duncan.  It has a lovely mottle to ti, combining a medium dark brown, a caramel, and a beige.  If I drank coffee, it might remind me of coffee with caramel and a light froth.


Thursday, July 14, 2016

The Second Totem - a Black Cat


This little totem is also stoneware clay.  The glaze is Mayco "Black Walnut" which is a beautiful rich blend of black and brown.  The stones are kyanite, blue chalcedony, and smoky quartz.

I'm tempted to keep him because he reminds me so much of my dear departed Starbuck - the best cat ever!  But I guess I'll put him in my shop and perhaps he can bring joy to someone else's heart.


Wednesday, July 13, 2016

The First of a Totem Trio


I just added the final touches to a trio of totem animals that I sculpted a few weeks ago.  I sculpted them from stoneware - a mid-range fire clay.  The thing I really like about this clay is the ring of it when you tap on it.  It's like glass rather than clay, making that beautiful clear pinging sound.  The downside is that I don't have as many colors of glaze for this type of clay as I do for the lower fire earthenware, so my color choices are limited.

This is a mid-range glaze that I like very much, called "Sea Salt"  - a nice warm white with little speckles.  The eyes are "Black Walnut" which is a brownish black mottled with black.  At the edges, it's more brown as you can see around the edges of the eyes.  both glazes are by Mayco.


I finished to totems by tying artificial sinew around the "waists" and adding semi-precious gemstone beads.  It would be nice to choose the beads so that the mystical meanings of the stones complement the mystical meanings of the animals, but I decided to just go with color instead.  So this polar bear has chryophase, Peruvian opal, prehnite, and quartz.

Initially, I wasn't too happy with the sculpting as I thought it was a bit crude.  But now that it's finished, I like it.  He looks rather impish.

Saturday, July 9, 2016

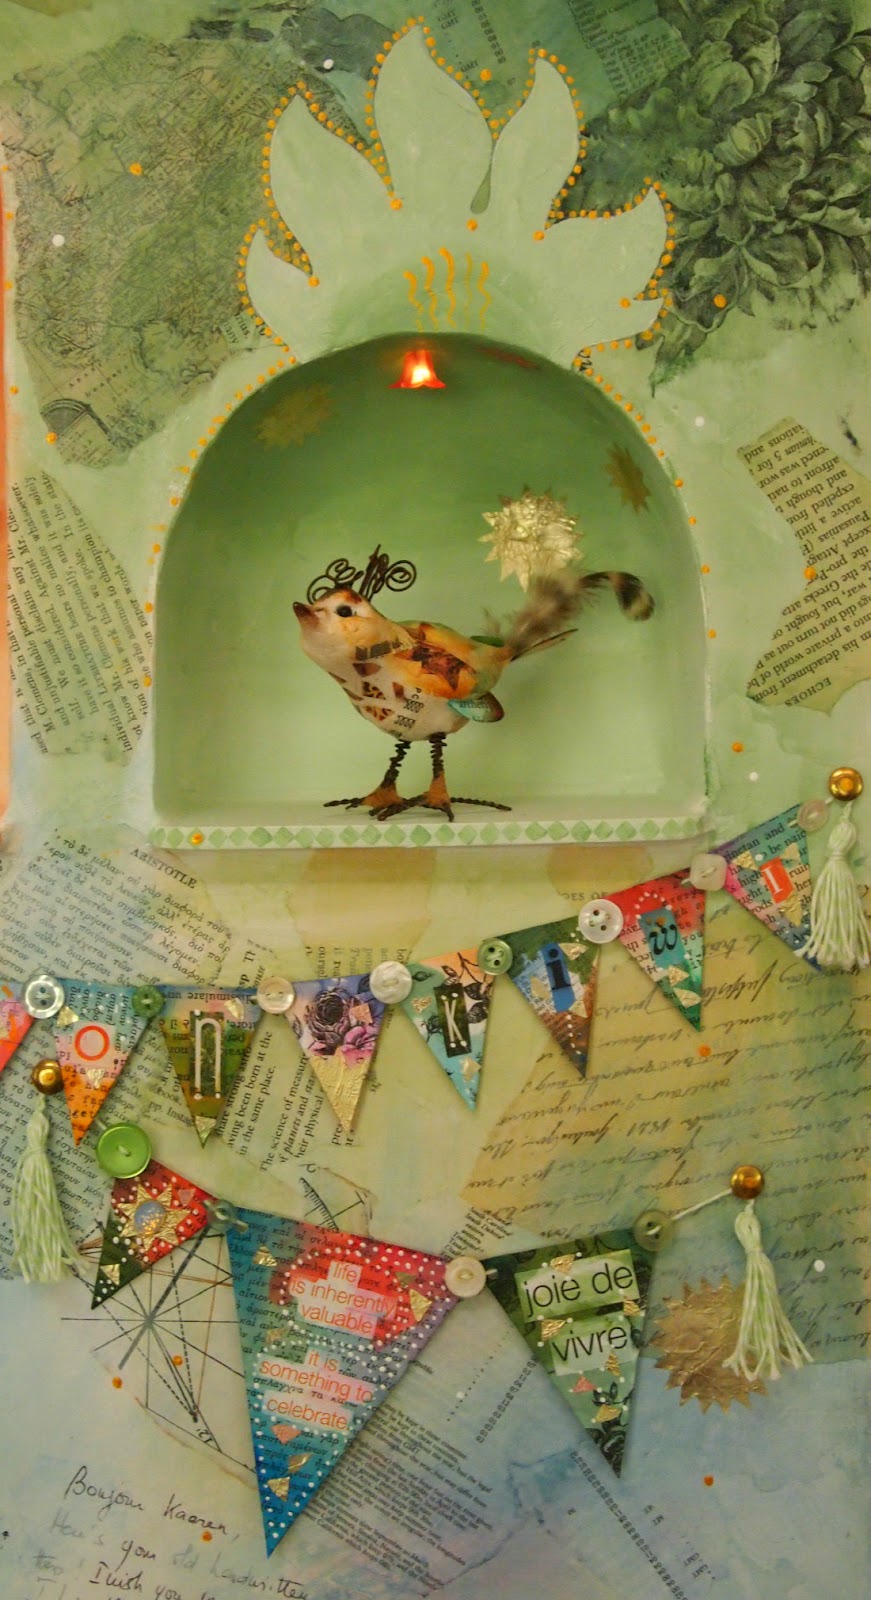
Burdz in Niches - Finished!


 It's finished!  And I'm really happy with it.  Actually, more than that - I really like it!  Yea!

I will enter it in "Cloth, Paper, Scissors" magazine's mixed media competition.  It would be so cool to be one of the winners, because then the piece would be published in their magazine.  That could change my life!

Anyway, I really like this way of working - starting with the black and white collage then adding layers and layers of transparent acrylic washes.  The dark and light patterns that emerge are sometimes surprising and seemingly always interesting.

My favorite part is the green right side.

I was a bit worried about all the color in the pennant garlands, but in the end, I think it's fine - largely because the color is concentrated rather than spread out all over the piece so it accentuates the color on the birds.  I mean, the "burdz!"


Friday, July 8, 2016

Color and Flag Garlands


I put the lights in.  They're so easy to use and they add a great touch.

I've also put color on the background and made garlands of little paper flags.  I just have the garlands taped on for now to decide where I want them.  To make the garlands, I punch holes in the top two corners of each flag and then threaded them alternately with small two- or four-hold buttons.

So far, so good.

I really like this way of working - start out with a concept then take it slowly, a step at a time, deciding on the next step at each step along the way.  There's a lot of contemplation involved, but I think it works better than trying to plan the whole thing out from the beginning.  I think it gives more room for ideas.

Monday, July 4, 2016

Continuing with Burdz in Niches


My next step was to add the bottom layer of collage - all black and white (or off white) - mostly for texture, and a little bit for the images.  I tried to concentrate the darker pieces towards the top and tried also to balance the browner, that is, the more aged, pieces across the whole.

I also made some little pennant pieces that I will decorate and then make little banners from to hand from beneath the niches.  For those, I started with a piece of Strathmore mixed media paper and glued some of the same papers I used for this layer of collage on both sides.  I stuck with the lighter pages.  Then I cut the banner pieces from that.  To glue the papers on, I used a Mini Collage Glue Stick from www.rangerink.com.  I really like this glue stick because it doesn't buckle the paper.

Saturday, July 2, 2016

Back to Burdz in Niches


I finished the niches by rounding the insides with paper clay.  I had to add the paper clay in layers - three of them - because if you apply the clay too thickly it will crack.  So that took a bit of time as each layer took a full 24 hours to dry.

Meanwhile, I built the top.  It is not attached.  It sits in place and is stabilized by a piece on the underside which fits nicely into the bottom piece.  I want the top to be removable because I'm planning to add tiny lights in the tops of each of the niches so I will need access to the inside in case I need to change a battery.

So now it's time to gesso the piece, then on to the fun stuff - the decoration!