
Here are all the materials I'm going to use - 14 gauge aluminum wire, pipe cleaners, pure wool felt, and wool fiber in various colors. I'm also showing the notebook because every time I made a new type of animal I keep notes so that I can make another one in the future.

The first step is making the wire armature. The gauge of wire depends on the size of the animal - the larger the animal, the lower (heavier) the gauge. The wire armature is much like a skeleton. It provides support for the figure plus allows it to be posable to some extent.

The wool fiber won't stick very well to a plain wire armature, so I wrap the armature with pipe cleaners. The fuzziness of the pipe cleaners helps the first layer of wool to stick.
Needle felting is an additive sculptural process. That is, I build form by adding material in the appropriate shapes in the appropriate places.
For most of the first stage of the needle felting I use a core wool roving. Roving is like a thick rope (not twisted, though) of wool fiber that you can split lengthwise so you can have thinner or thicker pieces to work with. The roving allows me to wrap the armature. Core roving is available in a variety of colors but I most always use white.
As I add wool, I secure it in place by repeatedly poking it with a special needle. Wool fiber has tiny barbs on it, as does the needle. Poking the barbed fiber with the barbed needle entangles the fibers and creates a single mass. The more often you poke, the more compact the mass becomes. In addition to securing the fiber in place, one can use poking to create particular shapes.
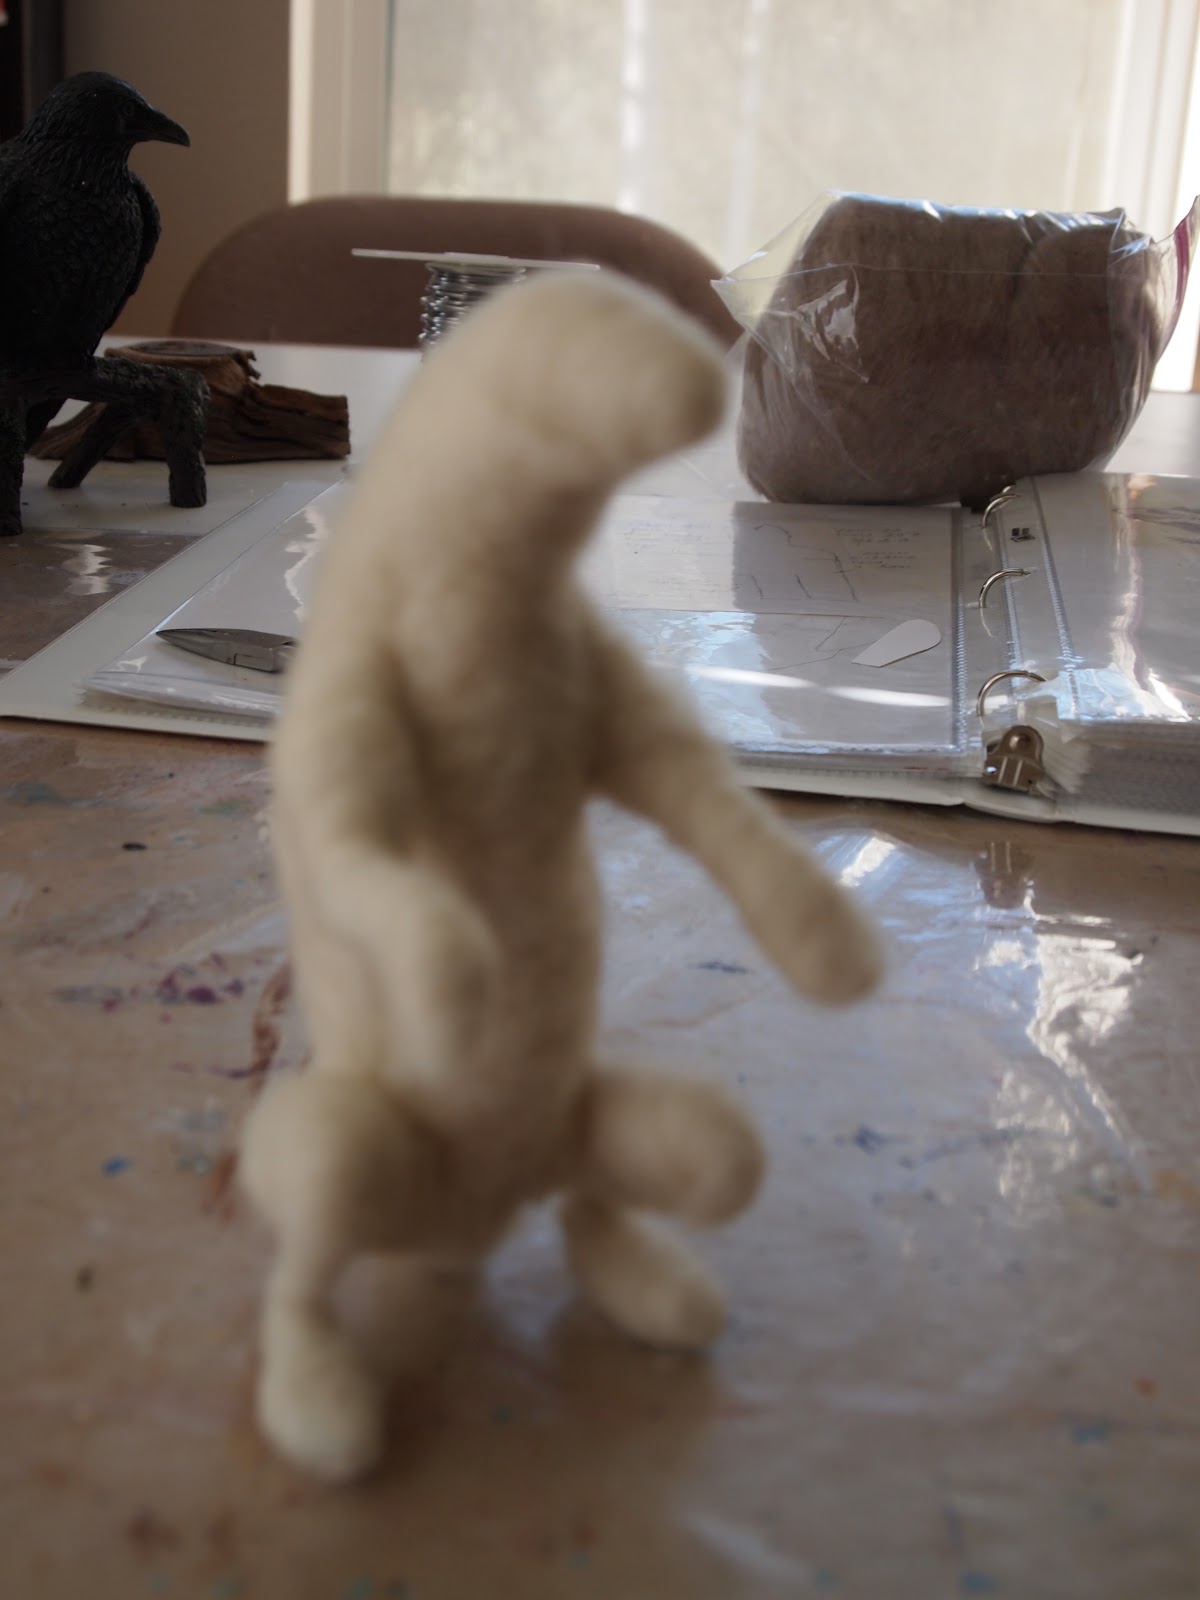
The photo above shows the rabbit after 3 or 4 stages of adding wool. In the first stage, I add wool to the entire armature. After that, I continue to add wool where the animal is thicker. So, there are several layers on the belly, but few on the lower legs and arms.
The tricky part of the core wool felting is to not add too much. That's because there needs to be "room" for the final layer, which is the color layer.

Bird's beaks or feet, or claws on larger bears are other examples. For bird beaks or bear claws, I make then with polymer clay, cure them, sometimes paint them, and glue them to the armature before I begin felting. For bird feet, I often make them with twisted wire as part of the armature, using rusted or colored wire.
I made the rabbit's ears as a separate piece and attached them to the rabbit when I was nearly finished with the core wool. At that stage I can tell how big they need to be and where to attach them. I cut two ear shapes from pure wool felt for each ear. A single piece of cotton covered florists' wire forms the armature for the ears. The middle of the wire is the space between the ears. One either side, a long loop of the wire is inside the ears, then the ends of the wire wrap around the head. I sew two felt ear pieces all around the edges, sandwiching one of the long wire loops between them.
Before I attach the ears to the head, I needle felt wool fiber in the finished colors on both sides of the ears. I find this step very difficult to do once the ears are attached to the head.
To attach the ears, I wrap the end wires tightly around the head, cutting off any excess. Finally, I needle felt core wool over the wires.

The next stage is to add the colored wool. At this point, I tend to use wool batting rather than roving. Batting is thick sheet of loosely entangled wool fibers. Wool batting is available in a nice variety of colors.
The final step is to add the eyes. The eyes on this little rabbit are 8mm amber glass eyes with black pupils and wire loops on the back. I get my glass eyes from www.glasseyesonline.com and I highly recommend them and their products.
I think this little rabbit needs a special touch so it's not quite finished. I'm thinking about what that special touch will be, and one idea is a little sweater that I would make from scraps of an old cashmere sweater - like the beautiful lavender pieces that she's sitting on. (I bought these recycled cashmere pieces from another Etsy seller.)
No comments:
Post a Comment