Friday, August 5, 2016

A Collage for a Challenge


The next reader challenge from "Cloth, Paper, Scissors" Magazine is to create an 8"x10" piece of art featuring hand lettering as the focal point.  I'm finding it both fun and stimulating to enter these challenges and this one is right up my alley as I really like words!

Pretty quickly, I decided that my word would be "oiseaux' which is French for "birds."  From there, I gathered my collage materials, focusing on pieces with French words or writing, or birds.  It's always fun to go through the papers I've saved and remind myself of the things I have.  I found several photos of birds from magazines and considered using them directly.

That led me to a bit of research on copyright law and I think I may have been OK with it, but I decided to do drawings instead and use them.. I love to draw, and I think it makes for a finished piece that is more special.  So I did the drawings on Strathmore Mixed Media paper and then added a touch of transparent acrylic, working with it as though it were watercolor.

I did a couple of layers and then stopped at this point to let everything dry really well over night.  In the morning, any of the papers that had wrinkled slightly were nicely flattened out.

Thursday, August 4, 2016

The Finished Needle Felted Bear - Grrrrr!


I finished the bear and am happy with him, but I wanted some touch that would make him special - not like every other bear!  After much consideration, I came up with the warrior necklace.  I made a little polymer clay "tooth" then strung it on a cord with a tiny river rock on either side.  Now I think I have a special bear!

Saturday, July 30, 2016

Needle-Felted Bear

 I wanted to do another needle felted animal and decided on a bear.  Bears have an extra step because I first have to make the claws from polymer clay and then glue them to the toes on the armature.

Then I can begin adding the wool.  I began with the feet and used my finished color because there isn't a lot of wrapping there - probably not enough for a core wool inner layer followed by an outer layer of the finished color.

From there, I added quite a bit of core wool.  I've been primarily using roving, but for this piece, I tried the loose wool fiber that I got a few years ago from livingfelt.com and it worked quite well.  It was perfect for this piece because wrapping with the core wool yields a shape which is symmetric around the armature wire, but you can add bits of the looks core wool for uneven shapes.

In this bottom photo I've begun adding the finished color all over.


Tuesday, July 26, 2016

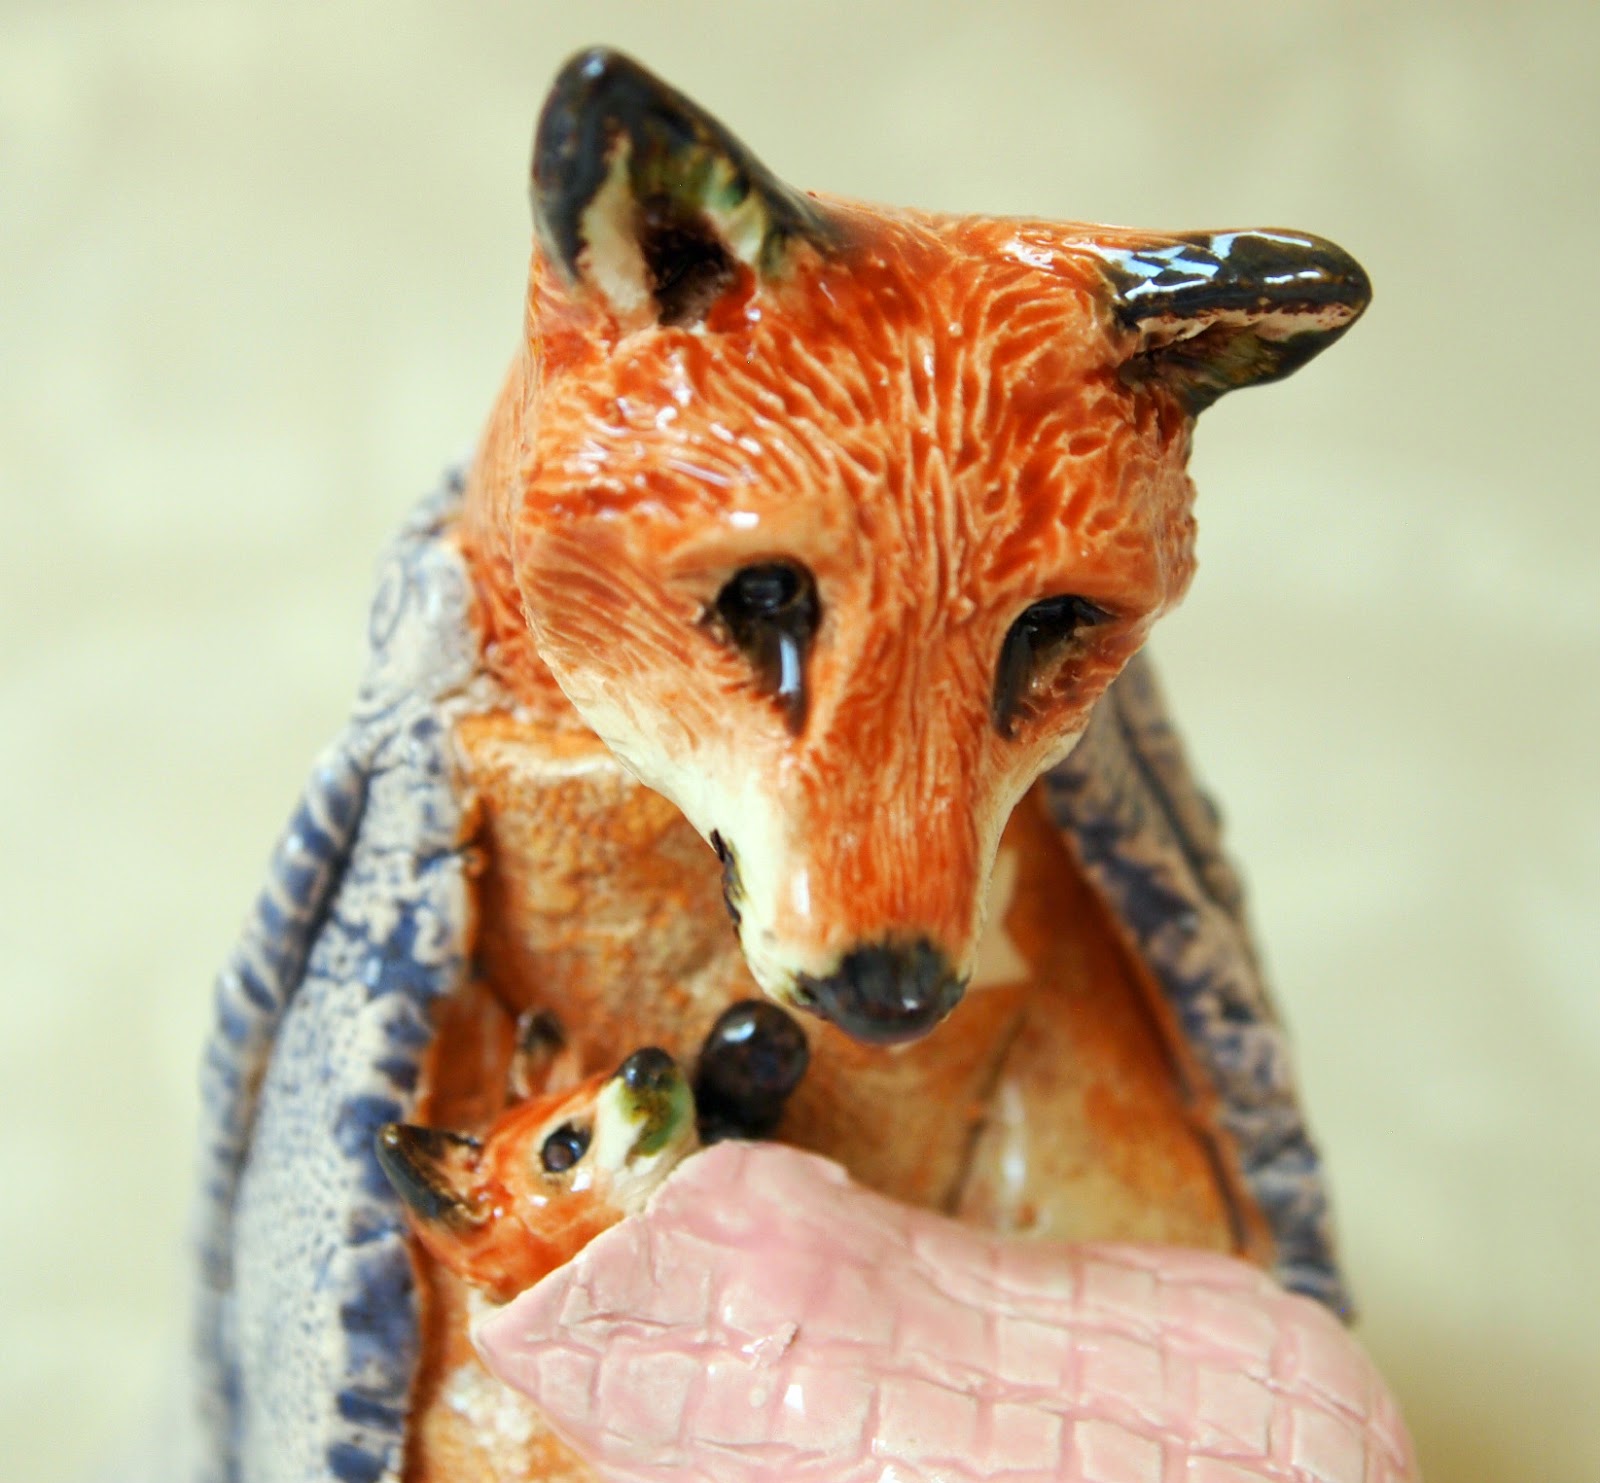
My Ceramic Fox Family


I originally had mixed feelings about this little sculpture.  But I held out hope that it would be better when glazed.  When I took it out of the kiln I wasn't happy with it.  I thought mom's cloak was too washed out and that her dress was not as light as I wanted it.  But the more I looked at it, the more I liked it.  I guess the expressions worked their magic with me.


Here are the two young girls.  I wasn't able to get their paws touching, but I guess it looks like I've captured the moment when they're reaching for each other's hands.


And here's the family.  They're going to Grandma's house to show her the new baby.  The colors are subdued, and probably (I wouldn't know, really) not from this year's favored palette, but I'm happy with them.  I've taken liberty with this family portrayal because in nature all the siblings would be the same age!

I started to list them for my Etsy shop, but decided to get a few opinions about pricing - one of my really weak points!

Saturday, July 23, 2016

The Finished Gelato Piece - a Chipmunk


My plan had been to finish the piece by painting a little chipmunk in the center frame.  So I began by drawing a chipmunk on a separate piece of paper so that I could trace and transfer it to the board.  But I got so involved in the drawing that it because a finished piece in itself.  So I decided to just tear the right size piece out of the drawing paper and glue it to the center of the board.  Then I put just the faintest possible washes of the blue and green Gelato colors in the background of the drawing.

A quick spray with workable fixative sealed the piece.  I love this little chipmunk!  I was going to put her on my Etsy site, but I think I'll hold onto her for a while!

Thursday, July 21, 2016

Trying Gelatos


I've had a beautiful set of Faber Castell's Gelatos for quite a while now, and I finally got around to trying them.  I had a 6" x 8" piece of 1/4" hardboard covered with crumpled masa paper (a type of rice paper) so I decided to work on that since I have often worked with watercolor on this surface.

Before I started, I watched a few videos on U-Tube about how to use them.  One thing I learned is that they behaved differently on papers that have different absorbencies.  I painted a rectangle of white gesso in the center of the board to see how differently the gelatos would act on the masa paper versus the gesso.  It was very easy to lift the color - and to spread it very thin - on top of the gesso.

The Gelatos are stick pigments that come in a screw-up tube like chapstick.  They are water soluble.

A combination of the rough surface and the large size of the gelatos (about 9/16" in diameter) led me to not try for detail.  I just rubbed on color, vaguely suggesting roses and leaves.  After rubbing the pigment on I wetted it with plain water in a brush and moved it around and blended it a bit.  Then I added more pigment that I didn't blend.  (You can also blend the Gelatos by rubbing them with your finger or a dense sponge that comes with the set.)

The result was very colorful and rich, but just a bit too bright for me.  So I used another product that I've had for a while but hadn't used before.  I sprayed the surface with Perfect Pearls spray mist and used gold and blue patina.  That dulled it down just a bit, and added shimmer.  However, some of the Gelatos are metallic and have a shimmer of their own.

I decided to add a rough little frame in the middle with gold dimensional paste.  This had been a fun experiment so far.  But, now what?

Tuesday, July 19, 2016

More Sculpting


One of my Etsy customers special-ordered a bear wall plaque.  She was looking through the items I had sold, saw it, and asked me if I could make her one.  Sure!  You see it lying on the drying rack at the right.

But it's a shame, as well as a waste of electricity, to fire the kiln for just one piece, so I made more.  Last winter's rabbit ornaments with the Swarovski crystals were well received, so I made another one - it's in the middle of the photo.  Then I decided to make other arctic animals in the same design, so I made an arctic fox (on the left) and a polar bear (to the right of the fox).

But that sill wasn't enough!   I proceeded to make a chipmunk in a nice dress.  I liked her so well that I wanted to keep her for myself (the pieces I was sculpting were for my Etsy shop), so I decided to make a second one - one for the shop and one for me.  It's been about five days since I finished them and now that they're thoroughly dry, they're in the kiln for their bisque firing.