Thursday, June 30, 2016

The Gray Ewe


Yesterday was our weekly art get-together and I needed a more portable project than the Burdz in Niches that I just started.  So I scrounged around and found a lamb armature that I made some time ago but never finished - perfect!  It should take me between 2 and 3 hours to complete it and it's portable.

It was very relaxing poke-poke-poking the wool fibers onto the armature until this sweet creature finally emerged!  I added a collar made from embroidery thread in pretty shades of pink and peach with two tassels and a rusted bell.  "Laura" feels so special!


As I've done needle felting over the last few years I've organized myself pretty well.  Each time I made a new animal I begin by finding a graphic of it's skeleton and from there I make a full-scale drawing of the armature for the size animal I want to create.  I save the drawing in a notebook along with reference photos and any notes I feel I will need in the future.  I can use that drawing later to re-create any of the animals I've done in the past.  But, still, they are all unique!


Monday, June 27, 2016

Burdz in Niches


"Cloth, Paper, Scissors" magazine is having a mixed media competition and I decided to enter.  I spent several hours over a few days deciding what my project would be, and I decided on "burdz in niches."

A few years ago I enjoyed making a series of small birds from paper clay with rusted wire legs and feet.  I decorated them with painting and collage and was quite happy with the results.  They've sat in my display cabinet ever since.  But now there's going to star in their very own mixed media display.  My intent is to make a display piece for them which will be decorated with mixed media, and that they and their display will form a single piece of mixed media art.

I made the base from 1/4" hardboard on the front and back, and 3/4" pine on the sides, top and bottom (except the top isn't connected yet).  I cut arches out of the front piece of hardboard and cut corresponding individual arches to glue on the back piece.  I could then glue in hardboard floors for the niches and create the rounded walls with three layers of heavy Strathmore mixed media paper which I applied layer by layer, gluing the new layer over the old with Liquitex Matte Gel Medium.


Here are the birds - I call them my "Burdz" - trying out their niches in the new construction.  The Burdz are, clockwise from upper left, Raspberry, Melon, Kiwi, and Blueberry.

Sunday, June 26, 2016

The Olive Green Challenge, all done!


The final step was to add the decorative detail in the border,  I added the dragonfly collage element, and painted some dot and leaf and vine details.  I also smudged metallic gold along the outer edge.  It was difficult to stop before I had done too much because this part is my favorite - all the fussing and little details.

So, this piece definitely features Olive Green.  In fact, it's nearly all green, but I think the value contrast, along with the different colors of green and the details of orange, turquoise, and lavender keep it from being boring.  I really hope that "Somerset Studio" magazine likes this piece and chooses to publish it as part of this challenge.  I shipped it off on Friday, hoping for the best.

Saturday, June 25, 2016

The Olive Green Challenge, part 5


Some of the chaos is gone from the piece now that I've worked more on the frame and have eliminated - or at least drastically reduced - the stark value contrast.

I first glued on collage elements, then painted the white parts with successive washes of Jenkins Green, Phthalo Green, and Sap Green until I was satisfied.  As always with painting over collage elements and pushing them way back, it's somewhat sad to see them come close to disappearing, especially the ones I painted myself.  But that's the way it goes with collage!

Friday, June 24, 2016

The Olive Green Challenge, part 4


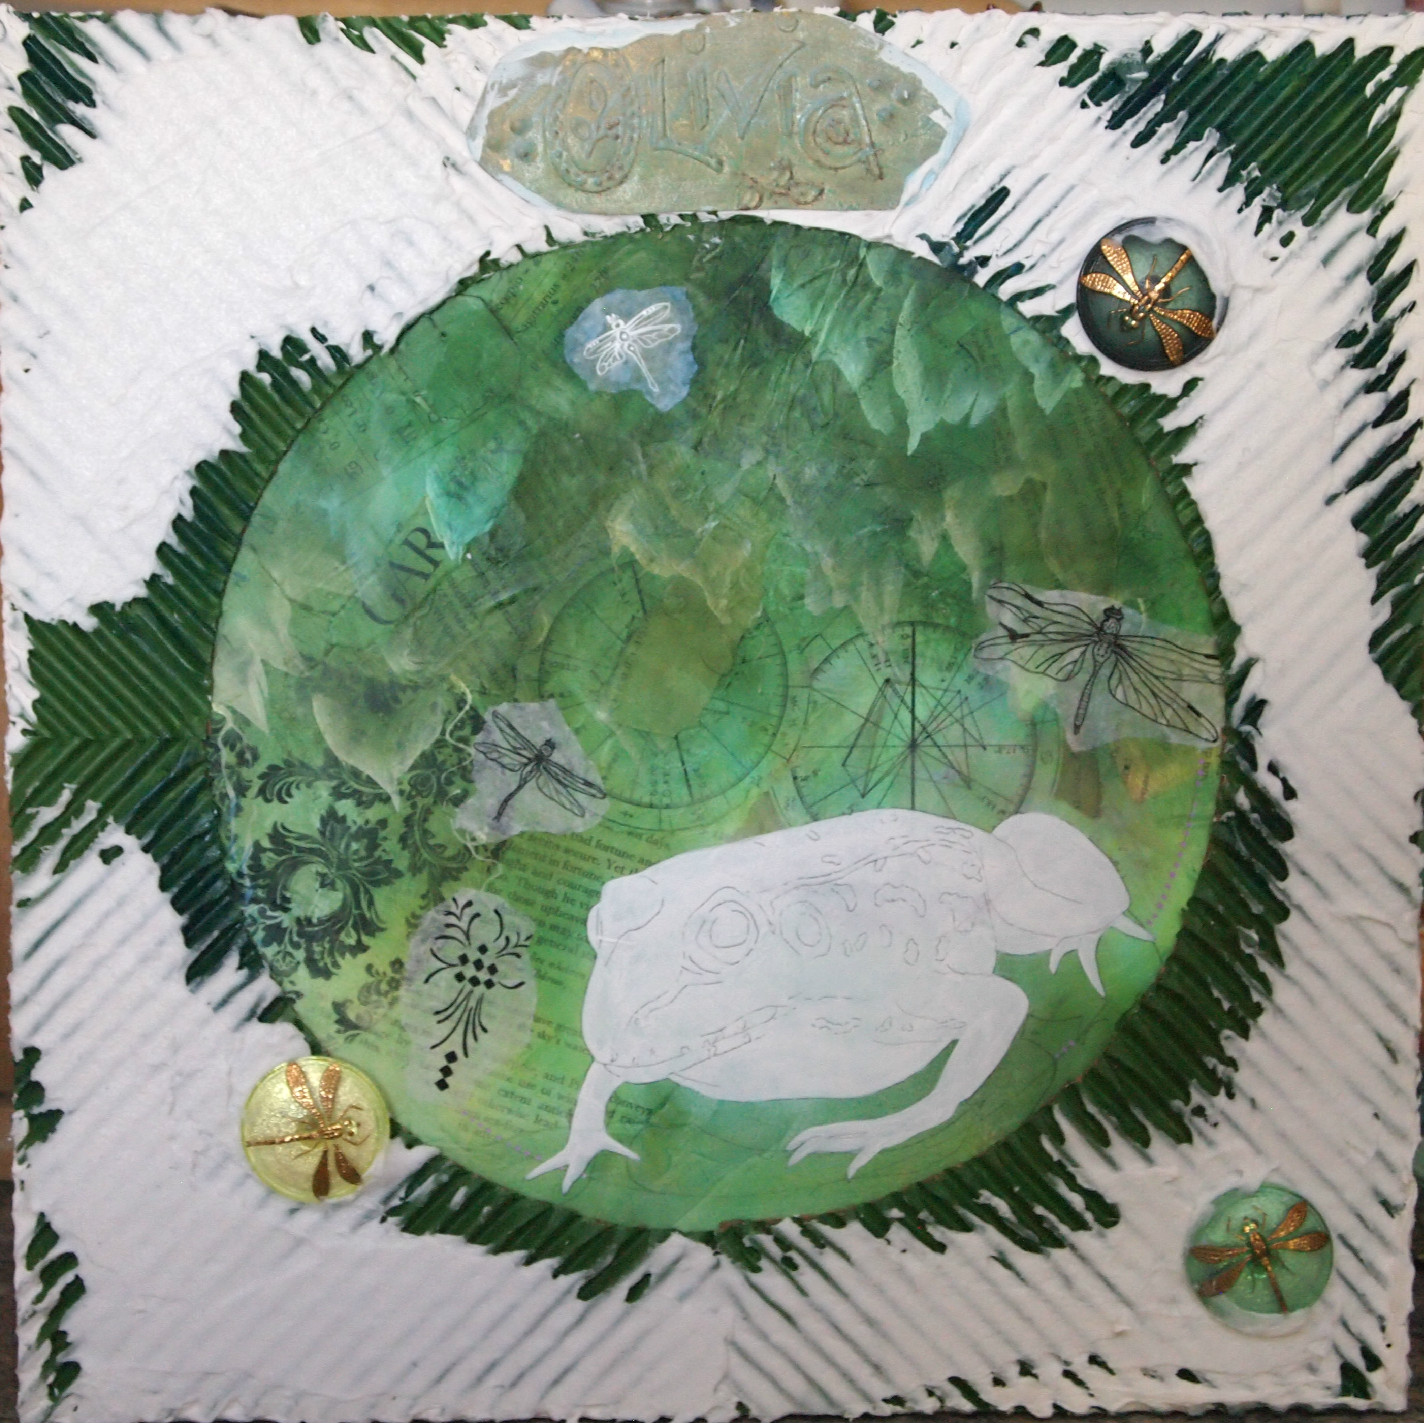
Now it's time to work on the frog.  I'm purposefully using more of an olive green than the background, and trying to pay attention to values.  Since nearly the entire painting will be green, I have to depend on value more than anything else to establish the composition and bring the focal point - the frog - forward.


After deepening the contrast in the frog and adding more detail, I was ready for the glass bead ring around the inside of the corrugated cardboard frame.  The edges of the cardboard have all the little tunnel from the corrugation, and I wanted to cover them.  In preparation, I pressed them down a bit.

The glass bead gel that I'm going to use will dry transparent, so I paint the color I want it to appear underneath where the gel will go.  I chose an iridescent turquoise acrylic by Jo Sonja, a scrumptuous color.  After it dried, I loaded a small plastic bag with the gel, cut away a small corner of the bag, and squeezed out a thick bead of jell all around the inner edge of the circle - rather like decorating a cake with icing in a decorating bag.  Now to let it dry.


Thursday, June 23, 2016

The Olive Green Challenge, part 3


I'm preparing for the next stage, both on the frame and on the frog panel itself.

I've applied coarse molding paste over parts of the corrugated cardboard with a palette knife.  I had these three Czech glass dragonfly buttons which I thought would be a perfect addition to this piece, so I simply embedded them in the molding paste.

The next step was to paint the frog with gesso and then transfer the drawing details.

Wednesday, June 22, 2016

The Olive Green Challenge, part 2

I've added the corrugated cardboard frame.  To do it, I cut four corner pieces and glued them down with Liquitex Matt Gel Medium.  I weighted it with books for good contact and let it set overnight.

The next morning, I peeled away the top layer of cardboard, revealing the corrugation underneath.  I waited until the glue dried so that the back wouldn't lift as I pulled the top layer away.  It seemed that there was a bit of dampness in the cardboard (from the medium, I presume) that made the peeling easier.

After that, I applied a layer of gesso, then painted it green - Chrome Oxide green, to be precise - and added a few darker splotches with washes of Phtalo Blue Red Shade.

I am bothered that the lightest spot of the circle will be covered with the frog, but I went into that last time - a shameful lack of planning!